들어가며
안녕하세요, 딜리셔스 웹 프론트엔드 개발팀 글로벌파트의 김선진입니다.
딜리셔스의 서비스 중 하나인 동대문 B2B 사업 플랫폼 신상마켓은 의류 사업에 종사하는 고객들을 위한 다양한 편의 기능을 제공하고 있습니다. 웹 프론트엔드 개발팀에서는 도매 고객을 위한 사이트와 소매 고객을 위한 사이트를 별도의 application repository로 관리하고 있습니다.
그렇기 때문에 도·소매 고객이 공동으로 사용하는 서비스를 개발할 때에는 해당 기능을 내부 library로 분리해서 작업해야 코드 중복을 제거하고 유지보수도 효율적으로 할 수 있습니다.
이번 글에서는 기존 Vue 프로젝트에 SFC로 작업되어 있는 컴포넌트를 Rollup.js 번들러를 사용하여 라이브러리로 빌드하는 과정을 소개하려 합니다.
Vue 2 + Composition API + Rollup 2.6으로 프로젝트 세팅하기

얼마 전, 소매 고객을 위한 간편결제 서비스인 ‘신상페이’ 개발을 담당했습니다. 결제 서비스인 만큼 소매 프로젝트에 의존성을 가졌다고 판단하여 REST API를 사용하는 SPA 환경인 신상마켓 소매 프로젝트의 컴포넌트를 사용해 개발을 진행했습니다. 하지만 이후에 도매 고객을 위한 ‘신상페이’ 기능 개발 요청을 추가로 받게 되었습니다. 그래서 앞으로의 확장 가능성을 고려해 기존에 소매 프로젝트의 컴포넌트를 사용하던 ‘신상페이’를 라이브러리로 분리하는 것이 좋겠다고 판단했습니다.
0. 기능 정의
컴포넌트를 라이브러리로 분리하기 전에 기존 프로젝트에서 의존성을 제거하고도 독립적으로 기능할 수 있는 부분을 가려내는 작업이 필요합니다.
‘신상페이’ 라이브러리는 크게 사용자에게 다음과 같은 기능을 제공합니다.
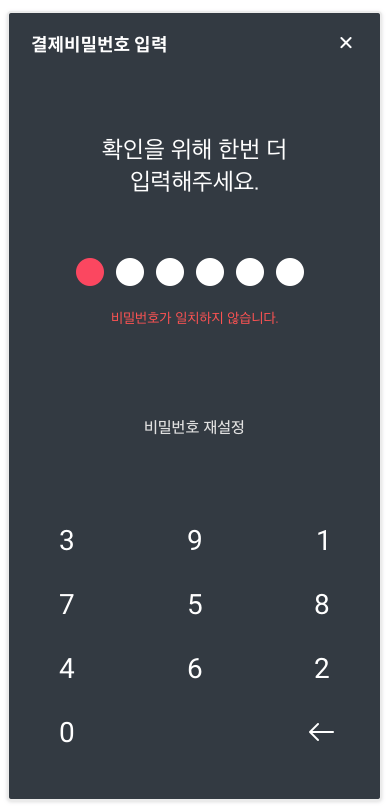
1) 보안 키패드
2) 구분에 따라 REST API 호출 및 url redirection
3) 실패, 성공 등의 정적 view 컴포넌트
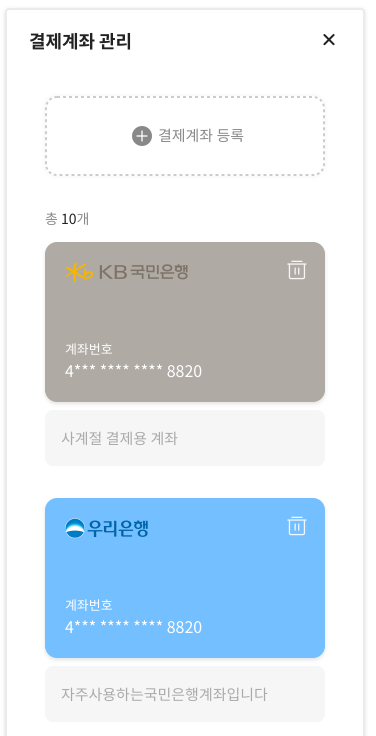
4) 계좌 관리 기능(CRUD)
5) UI 카드 컴포넌트
이 중에서 독립적으로 작동할 수 있는 기능은 1, 2번입니다.
나머지는 필수로 제공되어야 하는 기능이지만 프로젝트의 컨셉이나 아이덴티티에 따라 조금씩 달라질 수 있는 화면입니다. 하지만 계좌 관리 화면이나 UI 카드 디자인이 변경될 확률은 낮아 보입니다.
자, 이렇게 필수적으로 제공되거나 공통 컴포넌트로 사용 가능한 SFC를 추리는 작업이 완료되었습니다.
1. 번들러 선택
vue-cli를 사용하는 경우 build target 지정을 통해 쉽게 webpack으로 library build가 가능합니다. 이 과정을 거치게 되면 CommonJS 번들과 UMD 번들이 생성됩니다. vue-cli를 사용해서 빌드하면 편리하지만, ES6 모듈을 생성할 수 없습니다. ES6 모듈은 HTML에서 바로 사용할 수 있고, CJS 만큼 읽기 쉽습니다. 그리고 무엇보다 우리에게 익숙한 import/export 구문으로 제어할 수 있습니다.
ES6 모듈에 대한 자세한 설명은 아래 링크를 참고하세요.
https://ponyfoo.com/articles/es6-modules-in-depth
또한, 우리가 만들려고 하는 것이 라이브러리라는 사실을 잊어서는 안 됩니다. 완전히 동일한 기능을 하는 10KB 라이브러리와 8KB 라이브러리가 있다면 어느 것을 사용하시겠습니까? Rollup 번들러는 트리셰이킹을 기본적으로 지원하기 때문에 라이브러리를 더 적은 용량으로 빌드할 수 있습니다.
그러므로, 라이브러리 빌드에 Rollup 번들러를 사용하겠습니다.
물론, ES6 모듈을 사용할 수 없는 환경이라면 번들러 config를 수정하여 다른 형식으로 빌드하는 것도 충분히 가능합니다.
Do right thing!
번들러에 대한 자세한 설명은 아래 공식 홈페이지를 참고하세요.
https://rollupjs.org/guide/en/
2. 프로젝트 만들기
로컬에 프로젝트를 만들기 전에 배포할 git repo를 먼저 만들어둡니다. 버전 관리 및 배포는 git npm에서 관리합니다.
2-1. 프로젝트 구조
프로젝트 구조는 아래와 같이 세팅했습니다.
my-plugin
- build // rollup.config.js
- src // entry.ts
-- assets // image files
-- components // SFC
-- data // json data
-- framework // api call ts file
- package.json
...tsconfig 등 각종 설정파일
2-2. package.json
플러그인에서 사용되는 npm 모듈들은 —dev flag를 붙여 devDependencies로 설치해주세요.
package.json을 아래와 같이 세팅합니다.
{
"name": "{패키지명}",
  "repository": {
    "type": "git",
    "url": "{git repo url}"
  },
  "version": "{version}",
  "publishConfig": {
    "registry": "https://npm.pkg.github.com"
  },
  "description": "{설명}",
  "main": "dist/{패키지명}.cjs.js",
  "browser": "dist/{패키지명}.esm.js",
  "module": "dist/{패키지명}.esm.js",
  "unpkg": "dist/{패키지명}.cjs.js",
  "types": "{패키지명}.d.ts",
  "files": [
    "dist/*",
    "{패키지명}.d.ts",
    "src/**/*.vue"
  ],
  "sideEffects": false,
  "scripts": {
    "serve": "vue-cli-service serve dev/serve.ts",
    "build": "cross-env NODE_ENV=production rollup --config build/rollup.config.js",
    "publishing": "npm version patch&&cross-env NODE_ENV=production rollup --config build/rollup.config.js&&npm publish",
	},
	"devDependencies": {
    "@babel/core": "^7.12.10",
    "@babel/plugin-transform-runtime": "^7.14.5",
    "@babel/preset-env": "^7.12.11",
    "@babel/preset-typescript": "^7.12.7",
    "@rollup/plugin-alias": "^3.1.1",
    "@rollup/plugin-babel": "^5.2.2",
    "@rollup/plugin-commonjs": "^17.0.0",
    "@rollup/plugin-image": "^2.0.6",
    "@rollup/plugin-node-resolve": "^11.0.1",
    "@rollup/plugin-replace": "^2.3.4",
    "@vue/cli-plugin-babel": "^4.5.10",
    "@vue/cli-plugin-typescript": "^4.5.10",
    "@vue/cli-service": "^4.5.10",
    "@vue/composition-api": "^0.5.0",
    "axios": "^0.21.1",
    "cross-env": "^7.0.3",
    "minimist": "^1.2.5",
    "node-sass": "^4.14.1",
    "rollup": "^2.36.1",
    "rollup-plugin-inject-process-env": "^1.3.1",
    "rollup-plugin-terser": "^7.0.2",
    "rollup-plugin-vue": "^5.1.9",
    "sass-loader": "^8.0.2",
    "typescript": "^3.8.3",
    "vue": "^2.6.12",
    "vue-cookies": "^1.7.4",
    "vue-template-compiler": "^2.6.12"
  },
}
외부 모듈은 peerDependencies로 설정해줍니다.
"peerDependencies": {
    "@vue/composition-api": "^0.5.0",
    "axios": "^0.21.1",
    "vue": "^2.6.12",
    "vue-cookies": "^1.7.4"
  },
프로젝트에 svg 이미지 파일이 포함되어 있고, rollup에서 같이 번들할 필요가 있어서 @rollup/plugin-image 플러그인을 설치했습니다만 필요 없다면 디펜던시에서 제외하셔도 괜찮습니다.
2-3. entry.ts
import _Vue, { PluginFunction } from 'vue';
import * as components from '@/components/index';

const install: PluginFunction<any> = function installLib(Vue: typeof _Vue) {
  Object.entries(components).forEach(([componentName, component]) => {
    Vue.component(componentName, component);
  });
};

export default install;

export * as mobileInterface from "@/framework/mobileInterface";
export { default as sinsnagCashBankList } from '@/data/sinsangCashBankList.json';
export * from '@/components/index';
entry.ts 파일에 Vue install 함수를 만들어서 외부 프로젝트에서 Vue.use 구문으로 플러그인을 사용할 수 있게 했습니다.
개별 export는 import 구문으로 util function, data 등의 외부 내보내기가 필요할 때 작성해주세요.
2-4. rollup.config.js
rollup config file을 작성합니다.
먼저 외부 모듈과 글로벌 네임을 지정해 줍시다.
const external = [
  'vue',
  'axios',
  '@vue/composition-api',
  'vue-composition-api',
  'vue-cookies',
];

const globals = {
  vue: 'Vue',
  axios: 'axios',
  '@vue/composition-api': 'VueCompositionApi',
  'vue-cookies': 'VueCookies',
};
rollup config를 설정하고 내보냅니다.
import fs from 'fs';
import path from 'path';
import vue from 'rollup-plugin-vue';
import alias from '@rollup/plugin-alias';
import commonjs from '@rollup/plugin-commonjs';
import resolve from '@rollup/plugin-node-resolve';
import replace from '@rollup/plugin-replace';
import babel from '@rollup/plugin-babel';
import image from '@rollup/plugin-image';
import json from '@rollup/plugin-json';
import{terser}from 'rollup-plugin-terser';
import minimist from 'minimist';
import nodeResolve from "@rollup/plugin-node-resolve";
const esbrowserslist = fs.readFileSync('./.browserslistrc')
  .toString()
  .split('\n')
  .filter((entry) => entry && entry.substring(0, 2) !== 'ie');
const babelPresetEnvConfig = require('../babel.config')
  .presets.filter((entry) => entry[0] === '@babel/preset-env')[0][1];
const argv = minimist(process.argv.slice(2));
const projectRoot = path.resolve(__dirname, '..');
const config = {
  plugins: {
    preVue: [
      alias({
        entries: [
          {
            find: '@',
            replacement: `${path.resolve(projectRoot, 'src')}`,
          },
        ],
      }),
      image(),
    ],
    replace: {
      'process.env.NODE_ENV': JSON.stringify('production'),
    },
    vue: {
      css: true,
      template: {
        isProduction: true,
        transformAssetUrls: true,
      },
    },
    postVue: [
      resolve({
        extensions: ['.js', '.jsx', '.ts', '.tsx', '.vue', '.svg'],
      }),
      commonjs(),
    ],
    babel: {
      exclude: 'node_modules/**',
      extensions: ['.js', '.jsx', '.ts', '.tsx', '.vue', '.svg'],
      babelHelpers: 'bundled',
    },
  },
};
const esConfig = {
    ...config,
    input: 'src/entry.ts',
    external,
    output: {
      file: 'dist/sinsang-pay-lib.esm.js',
      format: 'esm',
      exports: 'named',
    },
    plugins: [
      json(),
      nodeResolve({extensions: ['.js', '.ts', '.svg']}),
      replace(config.plugins.replace),
      ...config.plugins.preVue,
      vue(config.plugins.vue),
      ...config.plugins.postVue,
      babel({
        ...config.plugins.babel,
        presets: [
          [
            '@babel/preset-env',
            {
              ...babelPresetEnvConfig,
              targets: esbrowserslist,
            },
          ],
        ],
      }),
    ],
  };
return [esConfig];
2-5. lib.d.ts
d.ts 파일을 작성하여 내보낼 타입을 지정해줍니다.
사용하는 프로젝트에서 타입스크립트를 사용하지 않는다면 문제가 없지만, 타입스크립트를 사용한다면 d.ts파일이 없는 경우 import export 과정에서 에러가 발생합니다.
import Vue, { PluginFunction, VueConstructor } from 'vue';

declare const SinsangPayLib: PluginFunction<any>;
export default SinsangPayLib;

export const SinsangPayLibSample: VueConstructor<Vue>;
export const mobileInterface: {
    MobileInterface: (hasMobileAction: any) => void;
    WebHandler: (hasMobileAction: any) => void;
    messageWebToMobile: (Action: string, params?: string | Object) => void;
}
export const sinsnagCashBankList: Array<{key:string;name:string;}>;
2-6. 배포하기
package.json에 작성했던 publishing 명령어를 수행하면 버전 패치 ⇒ 빌드 ⇒ 배포 순으로 실행됩니다.
버전 패치가 필요하지 않다면 아래 명령어를 실행해주세요.
$npm build
$npm publish
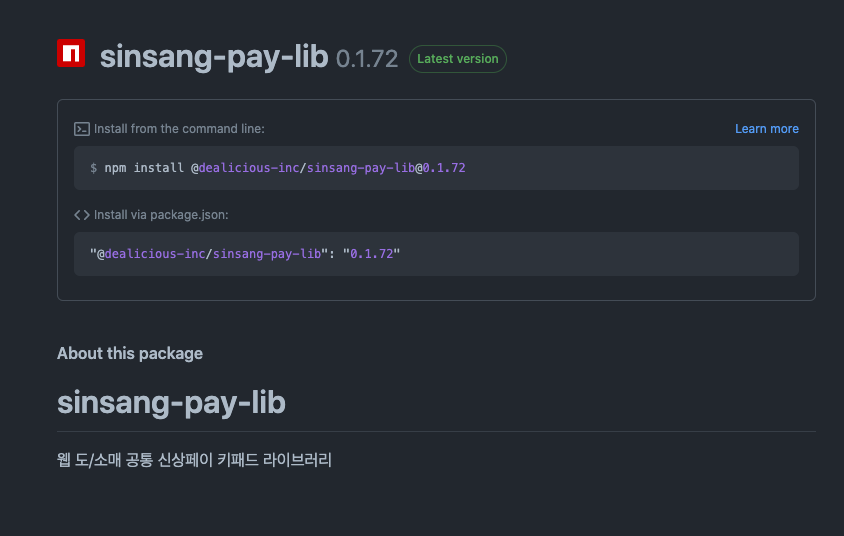
명령어 실행이 완료되고 나면 아래와 같이 git repo에서 배포된 패키지를 확인할 수 있습니다.
3. 플러그인 사용하기
배포된 패키지에 있는 install command line을 이용해서 npm module을 install 합니다.
Vue 프로젝트의 main 파일에 다음 라인을 입력해줍니다.
import SinsangPayLib from '@dealicious-inc/sinsang-pay-lib';

Vue.use(SinsangPayLib);
만약 config가 있는 플러그인을 만들었다면 Vue.use 함수의 두 번째 인자로 config를 넘겨줄 수 있습니다.
이제 프로젝트에서 컴포넌트를 사용할 준비가 끝났습니다!
마치며
라이브러리 빌드가 끝났습니다! 짝짝.
라이브러리를 배포하고 나서 local 개발을 하고 싶을 때도 있습니다.
2편에서는 local에서 개발 환경을 세팅하는 방법과 env설정에 대한 이야기를 해보겠습니다.
읽어주셔서 감사합니다.
김선진
딜리셔스 프론트엔드 개발자
"개발좋아맨"